Welcome to the Nikon FG instruction manual, your comprehensive guide to mastering this iconic 35mm SLR camera. This manual covers essential features, shooting modes, and maintenance tips to enhance your photography experience with the Nikon FG.
1.1 Overview of the Nikon FG Camera
The Nikon FG, introduced in 1982, is a compact and user-friendly 35mm SLR camera designed for both amateur and professional photographers. It features aperture-priority and manual shooting modes, offering flexibility in various lighting conditions. The camera is compatible with a wide range of Nikkor lenses, enhancing its versatility for different photography styles. With its durable construction and intuitive controls, the Nikon FG became a popular choice for those seeking a balance between simplicity and advanced functionality. Its compatibility with external flash units and manual ISO adjustments further underscores its adaptability. This overview highlights the camera’s key features, making it a timeless tool for capturing high-quality images.
1.2 Importance of the Instruction Manual
The instruction manual for the Nikon FG is an indispensable resource for unlocking the camera’s full potential. It provides detailed explanations of the camera’s functions, shooting modes, and maintenance procedures, ensuring users can operate the device effectively. The manual also covers troubleshooting tips and compatibility with accessories, helping photographers resolve common issues and optimize their setup. By understanding the manual, users can explore advanced techniques, such as manual mode and exposure compensation, enhancing their creativity and control over the final image. Whether you’re a novice or an experienced photographer, the instruction manual is essential for maximizing the Nikon FG’s capabilities and achieving professional-quality results.

Key Features and Technologies of the Nikon FG
The Nikon FG features aperture-priority and manual modes, compatibility with Nikkor lenses, and advanced metering systems. It was Nikon’s first camera with a built-in autofocus motor.
2.1 Aperture-Priority and Manual Modes
The Nikon FG offers two versatile shooting modes: Aperture-Priority (A) and Manual (M). In Aperture-Priority mode, users can set the aperture, and the camera automatically adjusts the shutter speed for optimal exposure. This mode is ideal for controlling depth of field, making it perfect for portraits and landscapes. Manual mode provides full control over both aperture and shutter speed, allowing experienced photographers to fine-tune their settings for precise results. Both modes are easily accessible via the camera’s intuitive controls, making the Nikon FG adaptable to various shooting scenarios and user preferences.
- Aperture-Priority mode simplifies exposure control while maintaining creative freedom.
- Manual mode offers full customization for advanced photographers.
- Both modes enhance flexibility in different lighting conditions and artistic needs;
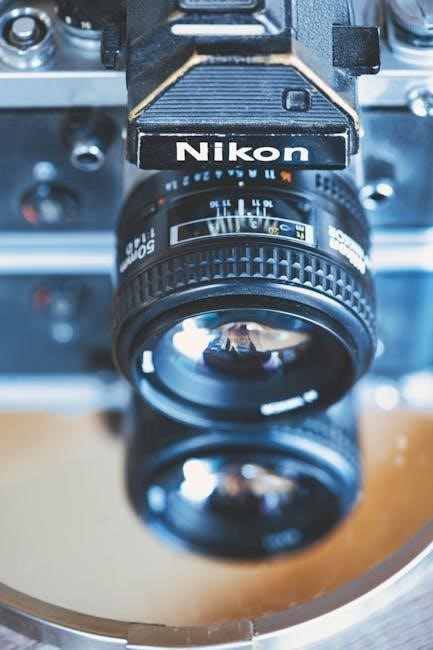
2.2 Compatibility with Nikkor Lenses
The Nikon FG is designed to work seamlessly with a wide range of Nikkor lenses, offering exceptional optical quality and versatility. This compatibility allows photographers to choose from various focal lengths and specialized lenses, including zoom, macro, and telephoto options. The camera supports both AI and non-AI Nikkor lenses, ensuring backward compatibility with older models. This adaptability makes the Nikon FG a versatile tool for diverse photographic needs, from everyday snapshots to professional-grade photography. The ability to interchange lenses enhances creativity and ensures that users can achieve the desired visual effects in different shooting scenarios.
- Seamless integration with Nikkor lenses ensures high image quality.
- Support for both AI and non-AI lenses provides flexibility for photographers.
- Wide range of focal lengths and specialized lenses available.
Nomenclature and Camera Components
The Nikon FG features a user-friendly design with clearly labeled external controls and internal mechanisms. Understanding each component is essential for optimal camera operation and photography.
3.1 External Controls and Buttons
The Nikon FG’s external controls are designed for intuitive operation. The shutter speed dial allows easy adjustment of speeds from 1 to 1/1000th of a second. The aperture ring on Nikkor lenses enables precise aperture control. The exposure compensation dial simplifies adjusting exposure settings. The film advance lever and rewind crank facilitate film handling. Additional buttons include the self-timer and multiple exposure switch, enhancing creative flexibility. Understanding these controls is crucial for mastering the camera’s functionality and achieving optimal results.

3.2 Internal Components and Mechanisms
The Nikon FG’s internal components are engineered for precision and reliability. The metering system utilizes a silicon photodiode to ensure accurate light measurement. The shutter mechanism is electronically controlled, offering speeds from 1 to 1/1000th of a second. The mirror lock-up and viewfinder provide a clear view for composition. Internally, the film transport system ensures smooth loading and advancing of film. These mechanisms work together seamlessly to deliver consistent results. Proper care and maintenance of these components are essential to preserve the camera’s performance and longevity, ensuring it continues to function flawlessly for years.

Shooting Modes on the Nikon FG
The Nikon FG offers three primary shooting modes: Programmed, Aperture-Priority, and Manual. These modes provide flexibility for photographers, from automatic operation to full creative control over exposure settings.
4.1 Programmed Mode (P)
In Programmed Mode (P), the Nikon FG automatically selects both the aperture and shutter speed, providing a convenient, hands-off shooting experience. This mode is ideal for beginners or casual photographers who want to focus on composition without worrying about manual adjustments. The camera uses its built-in metering system to calculate the optimal exposure settings based on the lighting conditions. While it offers less creative control, Programmed Mode ensures consistent and reliable results in various shooting scenarios. It’s perfect for everyday photography, allowing users to capture sharp, well-exposed images effortlessly. This mode simplifies the photography process while maintaining high-quality outcomes.
4.2 Aperture-Priority Mode (A)
In Aperture-Priority Mode (A), you control the aperture, and the Nikon FG automatically adjusts the shutter speed to achieve the optimal exposure. This mode is ideal for photographers who want creative control over depth of field, allowing you to isolate subjects or ensure everything is sharp. Simply set your desired aperture using the lens aperture ring, and the camera will calculate the corresponding shutter speed. The metering system ensures accurate exposures, making it easy to achieve professional-looking results; This mode is particularly useful for portrait and landscape photography, where depth of field is critical. By adjusting the aperture, you can dictate the visual emphasis of your images while letting the camera handle the technical aspects of exposure. This balance of control and convenience makes Aperture-Priority Mode a versatile choice for both casual and advanced photographers.
4.3 Manual Mode (M)
In Manual Mode (M), you gain full control over both aperture and shutter speed, allowing for precise adjustments to suit your creative vision. This mode is ideal for experienced photographers who prefer hands-on control. The Nikon FG’s metering system provides guidance, but you set the exposure manually; To use Manual Mode effectively, select the aperture using the lens aperture ring and adjust the shutter speed with the shutter speed dial. The camera’s built-in light meter will help you determine the correct exposure, but the final settings are up to you. Manual Mode is particularly useful in complex lighting conditions or when you want to achieve specific artistic effects. With practice, you can master Manual Mode and unlock the full potential of the Nikon FG for professional-looking results.
Exposure Control and Metering
This section covers the Nikon FG’s exposure control and metering systems, including exposure compensation and bracketing, to help you achieve perfectly balanced photos in any lighting conditions.
5.1 Metering Systems and Sensors
The Nikon FG features a built-in, through-the-lens (TTL) light meter, providing accurate exposure measurements. It uses a center-weighted metering system, emphasizing the central area of the frame. This system is effective for most shooting scenarios, ensuring balanced exposures. The meter operates in both aperture-priority and manual modes, offering flexibility. The FG’s sensor is sensitive enough to handle a wide range of lighting conditions, from bright outdoors to low-light environments. By understanding how the metering system works, photographers can make informed adjustments for optimal results. This reliable system has made the Nikon FG a favorite among photographers seeking precise control over their exposures.
5.2 Adjusting ISO and Film Speed
The Nikon FG allows users to adjust the ISO sensitivity to match the film speed loaded in the camera. The ISO can be set between 12 and 4000, catering to various lighting conditions. To adjust the ISO, rotate the ISO dial located on the top plate until it aligns with the desired value. Ensure the dial clicks into place for accurate exposure readings. The camera does not automatically detect film speed, so manual adjustment is essential for proper exposure. Always verify the film speed before shooting to avoid underexposed or overexposed images. This feature provides flexibility, enabling photographers to adapt to different environments and creative needs effectively.
5.3 Exposure Compensation and Bracketing
The Nikon FG offers exposure compensation to fine-tune your shots in various lighting conditions. Adjust the exposure by ±2 EV in 1/3-stop increments using the exposure compensation dial. This feature is ideal for correcting metered exposures without changing aperture or shutter speed. Bracketing is also supported, allowing you to capture up to three exposures at different settings. This is particularly useful for capturing high-contrast scenes, ensuring at least one frame is perfectly exposed. Bracketing can be set manually, providing flexibility for creative control. Use these features to enhance your photography by capturing a range of exposures for later processing or selection.
Working with Lenses and Accessories
The Nikon FG is compatible with a wide range of Nikkor lenses, ensuring versatility for various photography needs. Accessories like flashes enhance functionality, expanding creative possibilities for photographers.
6.1 Compatible Nikkor Lenses
The Nikon FG is designed to work seamlessly with a variety of Nikkor lenses, offering flexibility for different photography styles. Compatible lenses include popular models like the AI-converted Nikkor 85mm f/1.8, Micro 105mm f/4, and Zoom 85-250mm f/4. These lenses provide exceptional image quality and versatility, catering to diverse shooting scenarios. Whether capturing portraits, macro shots, or wide-angle views, the FG’s compatibility ensures optimal performance. Additionally, the camera supports non-AI lenses with manual mounting, though certain features may not function. This adaptability makes the Nikon FG a versatile tool for photographers seeking precision and creativity in their work.
6.2 Using Flash and External Accessories
The Nikon FG supports various flash units, such as the SB-18 and SB-19, enhancing low-light photography capabilities. When using these units, refer to the instruction manual for synchronization settings. External accessories like the Speedlight SB-19 offer advanced features, ensuring balanced flash exposure. The FG also accommodates non-AI lenses with manual mounting, though some functions may not operate. Additionally, the camera’s compatibility with flash units like the Sigma EF-610 DG SUPER NA-iTTL expands creative possibilities. Proper setup and synchronization are crucial for optimal results, making the Nikon FG a versatile tool for photographers seeking to explore advanced techniques and achieve professional-quality images in diverse lighting conditions.

Basic Camera Operation
Mastering the Nikon FG involves understanding fundamental tasks like loading, advancing, and rewinding film, ensuring smooth operation for capturing high-quality images with precision and ease.
7.1 Loading Film
Loading film into the Nikon FG is a straightforward process that ensures your camera is ready for capturing high-quality images. Begin by opening the camera back, which is done by pulling out the film rewind crank until the back cover pops open. Next, insert the film cartridge into the film chamber, making sure it is securely seated. Align the film leader with the take-up spool and gently advance the film using the advance lever until it engages with the sprocket. Close the camera back and advance the film to the first frame. Finally, set the ISO sensitivity to match your film speed for optimal exposure control. Proper film loading is essential for ensuring your shots are sharp and well-exposed.

7.2 Advancing Film
Advancing film in the Nikon FG is a simple yet crucial step to ensure proper frame progression. After loading the film, pull the film advance lever downward until it stops at the stand-off position. This action moves the film to the next frame and cocks the shutter. You will hear a distinct click as the mechanism engages. The frame counter will increment, indicating the number of exposures made. Always advance the film before taking a new shot to avoid double exposures. If you need to rewind the film before finishing the roll, use the rewind crank. Proper film advancement ensures sharp, well-spaced images. Make sure not to advance the lever unnecessarily, as this could damage the film or camera mechanisms.
7.3 Rewinding Film
Rewinding film in the Nikon FG is essential when you’ve finished a roll or need to remove the film before it’s fully exposed. To rewind, open the camera back by pulling out the film rewind crank until the back cover pops open. Locate the rewind crank on the top left of the camera and turn it clockwise until the film stops moving. Continue winding until the film is completely rewound and the frame counter returns to “S.” Avoid opening the camera back during rewinding to prevent light exposure. Once done, remove the film cartridge and store it safely for processing. Ensure the film is fully rewound to prevent accidental exposure. This step is crucial for protecting your images and maintaining the camera’s functionality.

Maintenance and Troubleshooting
Regularly clean the camera and lenses to prevent dust and smudges. Check for common issues like shutter malfunctions or light leaks and refer to the manual for solutions.
8.1 Cleaning the Camera and Lenses
Regular cleaning is essential to maintain the performance and longevity of your Nikon FG. Use a soft, dry cloth to wipe the camera body and external controls, removing any dust or fingerprints. For the lenses, employ a microfiber cloth and lens cleaning tissue to prevent scratches. Avoid using chemicals or harsh substances, as they may damage the coatings. For stubborn smudges, slightly dampen the cloth but ensure it is not soaking wet. Never touch the lens surface with your fingers, as oils can leave residue. Clean the viewfinder and mirror chamber with compressed air or a soft brush. Store the camera in a dry, cool place to prevent mold and fungus growth. Regular maintenance ensures optimal image quality and camera functionality.
8.2 Common Issues and Solutions
Common issues with the Nikon FG include shutter sticking, inaccurate metering, and film advance problems. For a stuck shutter, clean the camera thoroughly with compressed air and ensure the battery is fresh. If metering is inconsistent, check the light seals for damage or clean the sensor with a soft cloth; Film advance issues often result from improper loading; ensure the film is correctly aligned and seated. If the viewfinder fogs, allow the camera to acclimate to ambient temperature before use. For persistent problems, consult a professional technician. Regular maintenance and proper handling will help prevent these issues and extend the camera’s lifespan. Always refer to this manual for troubleshooting guidance.
Mastering the Nikon FG requires understanding its features and troubleshooting common issues. Regular maintenance and proper handling ensure optimal performance, making it a reliable choice for photographers.
9.1 Summary of Key Features
The Nikon FG is a 35mm SLR camera offering aperture-priority and manual modes, ensuring creative control. It features compatibility with Nikkor lenses, a built-in motor for film advance, and advanced metering systems. The camera supports flash units like the SB-19, enhancing versatility; With its durable design and intuitive controls, the Nikon FG is a reliable tool for photographers seeking precision and flexibility in their work.
9.2 Final Tips for Using the Nikon FG
To maximize your experience with the Nikon FG, always ensure proper film loading and alignment. Regularly clean the camera and lenses to maintain image clarity. Experiment with shooting modes, starting with Programmed Mode for ease and transitioning to Manual Mode for creative control. Use compatible Nikkor lenses to optimize performance and explore external flash units for enhanced lighting. Properly store the camera to prevent damage, and refer to the manual for troubleshooting common issues. By following these guidelines, you can unlock the full potential of the Nikon FG and capture stunning photographs with precision and ease.